Build Your Stronghold: Unfolding the Strength of Back & Bicep Workouts
One of the most effective ways to build muscle is to focus on back-and-biceps workouts. This type of workout allows you to target both muscle groups at the same time, which results in more efficient muscle growth.
Plus, back-and-biceps workouts are relatively easy to perform and don’t require a lot of equipment. All you need is a set of dumbbells and a few other basic pieces of equipment, and you’re good to go.
A bicep and back workout is essential for a bodybuilder. These are the muscles in the front of your arm, and your back muscles are located in the middle and lower part of your back. The biceps, along with the triceps, make up most of the upper arm muscle group. The biceps are primarily responsible for flexing at the elbow – they bend your arm at the elbow joint. They also help to flex or extend your shoulder joints.
The back workout is important because it strengthens your core, which helps you maintain balance while standing or sitting still. It also strengthens muscles that help you breathe more deeply and easily than when you have weak or tight muscles in this area. Do not skip your biceps, shoulders, and back workout if you want to maintain your shredded physique.
This guide offers the ultimate training manual for forging your upper body into a fortress, complete with top exercises, essential tips, and common mistakes to avoid.
Why Should Combine a Back and Biceps Workout?
One of the most common mistakes people make when they are performing back with biceps exercises is that they do a back workout without including the biceps or doing these two workouts apart.
-
The most obvious reason for adding more biceps work to your back routine is that you’ll get better results in both areas. This is because back and biceps exercises work many of the same muscles, which means working your back will also make your arms bigger.
-
The rational technique is to leave biceps exercises until after you’ve worked your back. Begin the workout with biceps curls that will indeed stress your arms to the level where they may not be able to support you as they should on your back motions.
-
Moreover, combining these workouts saved an extra day for other exercises.
-
You can keep your heart rate up and burn more calories by working both muscle groups in one session.
Understand your Back and Bicep Muscles Before a Workout
Back Muscles
Latissimus dorsi (lats): The latissimus dorsi is a large, flat muscle that extends from the lower back to the upper arm. It is responsible for bringing the arm down and back, as well as rotating the arm inward.
Levator Scapulae: The levator scapulae is a muscle that runs from the side of the neck to the shoulder blade. It is responsible for elevating the shoulder blade.
Rhomboids: The rhomboids are a group of muscles located in the upper back. These muscles include the middle trapezius, lower trapezius, and serratus posterior superior. The rhomboids attach the shoulder blade to the spine and help to stabilize and move the shoulder blade.
Trapezius: The trapezius, or traps, is a large, triangular muscle that covers the upper and middle back. The muscle extends from the base of the skull to the lower back and is responsible for moving the shoulder blades and supporting the neck.
Bicep Muscles
Biceps brachii: Biceps brachii is a muscle located in the upper arm. It runs from the shoulder to the elbow and is responsible for bending the elbow.
Brachialis: Brachialis is a muscle in the upper arm that helps to flex the elbow. It is located on the outer side of the arm, just below the biceps brachii. The brachialis is one of the three muscles that make up the anterior compartment of the arm.
Top Five Back Exercises For Mass
1-Bent-Over Row
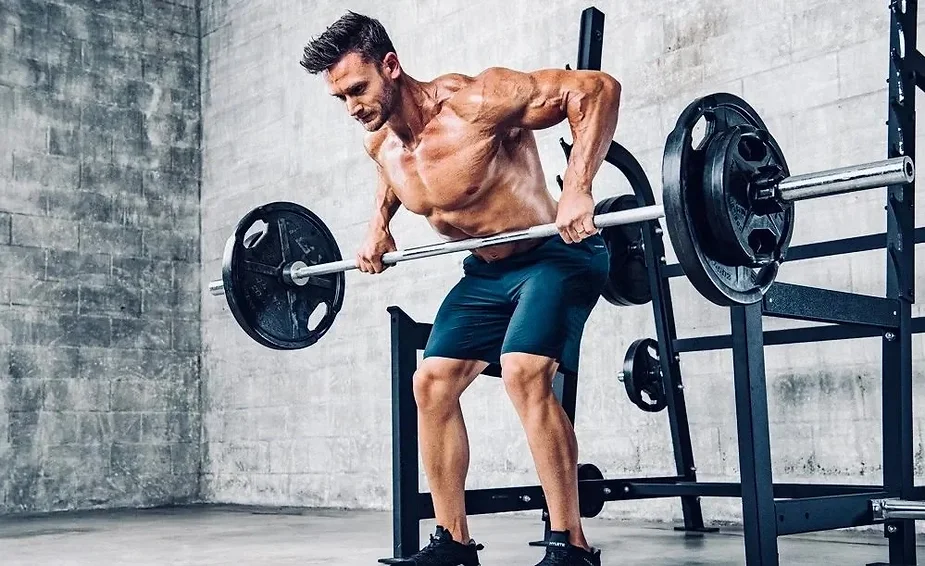
A bent-over row with a barbell is a weight-training exercise that targets the muscles of the back. It is a compound exercise that also involves the biceps, forearms, and trapezius. The bent-over barbell row is performed by holding a barbell with an overhand grip and bending at the waist until the upper body is almost parallel to the floor.
From this position, the weight is lifted to the stomach while keeping the back straight. The barbell is then lowered under control back to the starting position.
The answer to the common question asked by the beginners as to what muscles bent over row work, is the rectus abdominis, external and internal obliques, lower back, and the glutes are the most affected parts.
Bent over a Row with a dumbbell is a variation in this connection that helps to improve posture, as well as develop the trapezius and latissimus dorsi muscles. The exercise can also help to tone the midsection.
Master the Bent-Over Row with expert guidance
Steps in Workout (DOs’)
The steps in a bent-over barbell row workout are as follows:
-
Start by standing with your feet shoulder-width apart and your knees slightly bent.
-
Bend at the hips and lower your torso until it is almost parallel to the floor.
-
Grasp the barbell with an overhand grip and pull it up to your chest.
-
Lower the barbell back to the starting position and repeat.
Avoid These Common Mistakes (Don’ts)
Not maintaining a flat back – People make a common mistake when performing the bent-over row. They round their lower back instead of keeping it flat, which puts unnecessary stress on the spine and can lead to injuries.
Bouncing the barbell off the floor – Another mistake is to bounce the barbell off the floor when performing the bent-over row. This puts unnecessary stress on the lower back and can lead to injuries.
Not keeping the elbows close to the body – People make a common mistake when performing the bent-over row. They let their elbows flare out to the side instead of keeping them close to the body. This puts unnecessary stress on the shoulders and can lead to injuries.
Not using a full range of motion – This is a common mistake people make when performing the bent-over row. They don’t row the barbell all the way up to their chest, which reduces the effectiveness of the exercise.
Recommended Sets
-
For beginners: 3 sets of 10-12 reps
-
For intermediate: 4 sets of 8-10 reps
-
For advanced: 5 sets of 6-8 reps
2-Pull-ups
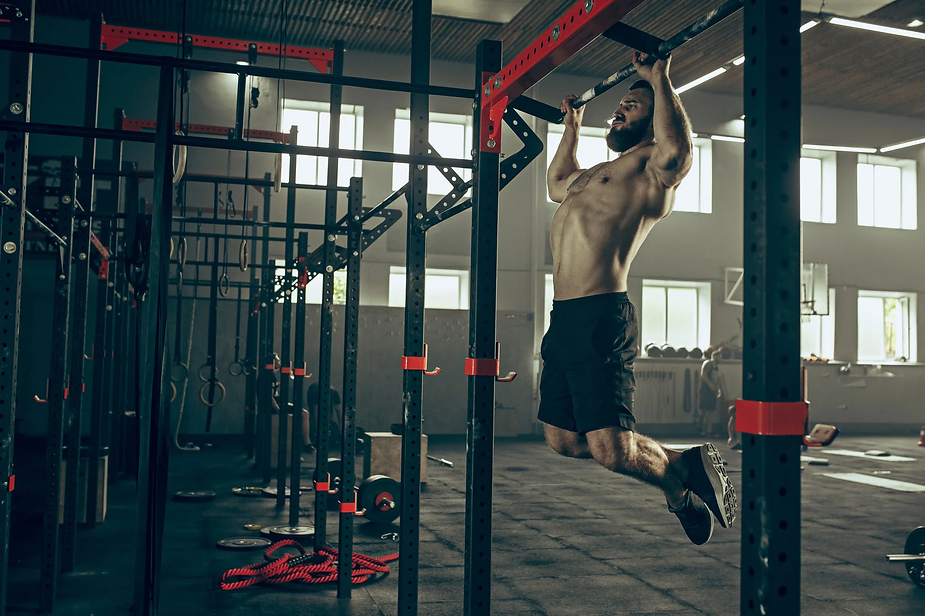
A pull-up is a callisthenics bicep and back strength-building workout. It is a compound exercise that also involves the back, biceps, forearms, and shoulder muscles. The pull-up is performed by hanging from a bar with the palms facing away from the body and then pulling the body up until the chin is over the bar.
There are many variations of the pull-up, such as the chin-up, which is performed with the palms facing toward the body, and the wide-grip pull-up, which is performed with the hands spaced wider than shoulder-width apart. The pull-up is a great exercise for building upper-body strength and can be performed with little to no equipment.
This is also a great exercise for beginners to start at home. You will only need a sturdy bar and a set of gymnastics rings, and you are good to go. Pull-ups are a bodyweight beast, engaging your entire back and biceps for explosive gains. If pull-ups are tough, start with negatives or assisted variations.
Options: Use of resistance bands for pull-ups
Resistance bands are perfect for pull-ups! They provide resistance and help you stay focused and motivated. They can also be used as part of a workout routine to increase your strength and endurance.
(Horizontal pull-up is another variation to this normal pull-up workout that uses weights to target the muscles in the back and shoulders. It is a low-impact exercise that can be done at home with minimal equipment.)
Explore a variety of pull-up variations to challenge yourself
Steps in Workout (DOs’)
-
Start by hanging from a pull-up bar with your palms facing forward and your hands shoulder-width apart.
-
Bend your knees and cross your ankles behind you.
-
Pull yourself up until your chin clears the bar.
-
Lower yourself back to the starting position.
-
Repeat for the desired number of repetitions.
Avoid These Common Mistakes (Don’ts)
Not using a full range of motion: When performing pull-ups, be sure to use a full range of motion by pulling your chin above the bar. Not using a full range of motion can limit the effectiveness of the exercise.
Not engaging the lats: Be sure to engage your lats throughout the entire exercise. This will help to build back strength and width.
Not maintaining a strong grip: A strong grip is essential for performing pull-ups correctly. Be sure to keep your hands close to the bar and your palms facing forward.
Recommended Sets:
-
For beginners: 2-3 sets of 5-10 repetitions
-
For intermediate: 3-5 sets of 10-15 repetitions
-
For advanced: 5-7 sets of 15-20 repetitions
3-Lat-Pull Down
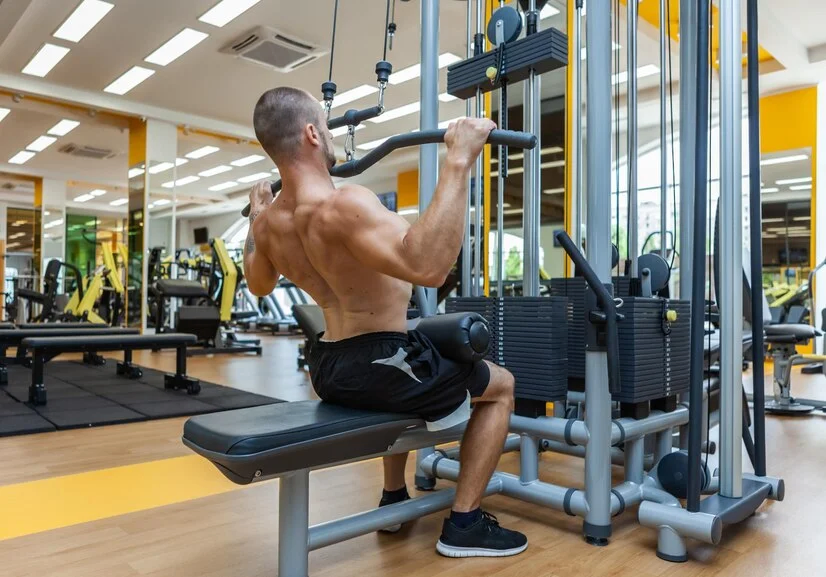
The lat pull-down is a compound exercise that targets the latissimus dorsi, or lats, which are the large muscles in the middle and lower back. The lats are responsible for bringing the arms down and back, and the exercise also works the biceps and traps.
The lat pull-down can be done with various grips, including an overhand grip, underhand grip, or neutral grip. The exercise can be performed with a barbell, dumbbell, or machine. The lat pull-down is a great exercise for building strength and size in the back muscles. It can also be used to correct imbalances between the lats and the chest muscles.
Lat Pull Down Close Grip or Wide Grip
Those seeking to improve their pull-ups or build lat strength should use a a wide grip; those seeking to target their mid and upper back or increase back strength should use a close grip.
Lat Pull Down with Rope: The Best Alternative
The rope lat pull-down is a great exercise for those with limited space. Unlike a barbell lat pull-down, the rope lat pull-down can be performed in a small space, making it ideal for home workouts. The rope lat pull-down is a great alternative and can be performed with a lighter weight, making it a good option for beginners.
Steps in Workout (DOs’)
-
Start by sitting on a lat pulldown machine with your knees bent and feet flat on the floor.
-
Grasp the lat pulldown bar with an overhand grip, and position the bar so it’s in front of your thighs.
-
Lean back slightly and then explosively pull the bar down to your chest, leading with your elbows.
-
Once the bar reaches your chest, pause for a count of one and then slowly return the bar to the starting position.
-
Repeat for the desired number of reps.
Avoid These Common Mistakes (Don’ts)
Not using a full range of motion: When performing the lat pulldown, be sure to use a full range of motion. This means that you should lower the bar all the way down to your chest and then raise it back up until your arms are fully extended.
Not engaging your lats: One of the main goals of the lat pulldown is to target the latissimus dorsi muscle. Be sure to engage your lats throughout the entire exercise by pulling the bar down towards your lower chest.
Using too much weight: It is important to use a weight that is challenging but not so heavy that your form suffers. Using too much weight can lead to poor form and puts you at risk for injury.
Swinging the weight: Another common mistake is to swing the weight back and forth instead of using a controlled motion. This not only takes away from the effectiveness of the exercise but can also be dangerous.
Not keeping your shoulders down and back: It is important to maintain good posture throughout the lat pulldown. Be sure to keep your shoulders down and back and avoid rounding your back.
Recommended Sets:
-
For beginners: 2 sets of 10-12 reps
-
For intermediate: 3 sets of 8-10 reps
-
For advanced: 4 sets of 6-8 reps
4-Single Arms Bent-Row

The single-arm bent row is a great workout for your upper body. It works your back, shoulders, and biceps. This exercise is simple to do and doesn’t require any equipment. You can do it at home or the gym. It works the muscles in your upper back, including the latissimus dorsi (lats) and the muscles in your biceps.
Steps in Workout (DOs’)
-
Start by holding a dumbbell in your right hand, and place your left hand on a bench or other sturdy surface for support.
-
Bend your knees and hips so that your torso is approximately parallel to the floor, and row the dumbbell up to your chest.
-
Pause for a moment at the top of the movement, and then lower the dumbbell back to the starting position.
-
Repeat the movement for the desired number of reps, and then switch sides and repeat with the left arm.
Avoid These Common Mistakes (Don’ts)
Not using a full range of motion: When you row, your arms should go all the way back and all the way up. Not using a full range of motion can limit the effectiveness of the exercise.
Not keeping your shoulders down and back: It’s easy to let your shoulders round forward as you row. This puts you at risk for shoulder injuries. Make sure to keep your shoulders down and back throughout the exercise.
Letting your elbows flare out: This puts unnecessary stress on your shoulders and can lead to injury. Keep your elbows close to your body as you row.
Not engaging your core: It’s important to engage your core muscles to stabilize your body as you row. Without engaging your core, you’re more likely to swing your body back and forth, which can lead to injuries.
Using too much weight: If you’re using too much weight, you won’t be able to maintain good form. This can lead to injuries. Make sure to use a weight that you can handle while still maintaining good form.
Recommended Sets:
-
For beginners: 2-3 sets of 10-12 reps on each arm
-
For intermediate: 3-4 sets of 12-15 reps on each arm
-
For advanced: 4-5 sets of 15-20 reps on each arm
Additional Resources: The benefits of the Single-Arm Bent Row explained
5-Deadlift
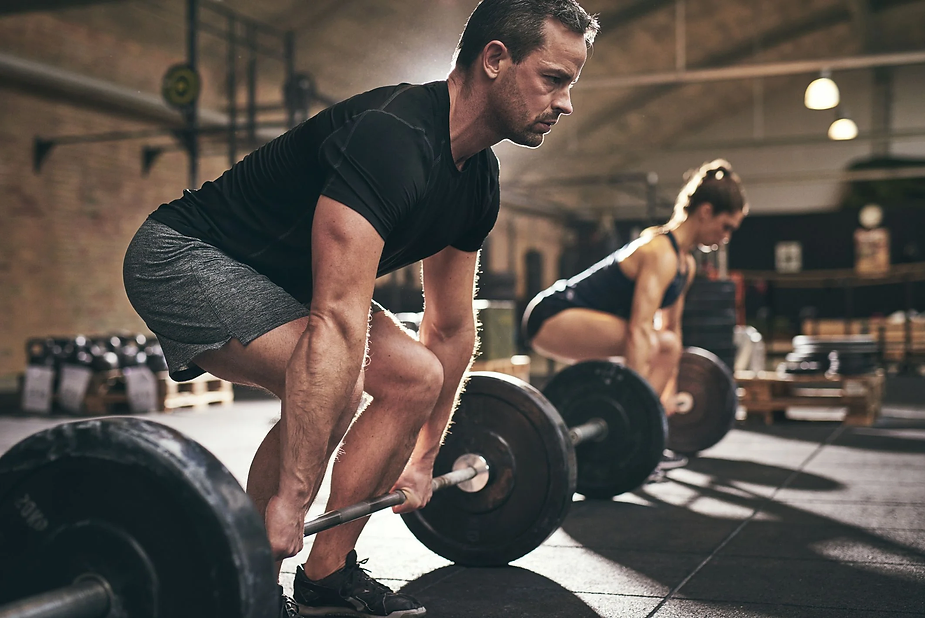
Deadlift is one of the most effective bodyweight exercises for biceps that build strength in the whole body structure. It works both the lower and upper body simultaneously. It is a compound movement, meaning it targets multiple muscle groups at the same time.
As you continue to lift weights, you are increasing your overall muscle strength. And it does wonders for your overall balance and posture as well. In addition, deadlifts can also help build endurance and improve your overall mobility. The thing that matters is the proper form used for the deadlift.
Variations of Deadlift
There are variations to perform this workout, like Dumbbell deadlifts, Barbell deadlifts,
Kettlebell deadlifts, Sumo deadlifts, Romanian deadlifts. More or less, all deadlift variations work the muscles of the hamstrings, glutes, and lower back.
Sumo deadlifts are similar to conventional deadlifts except that the lifter stands with feet together instead of slightly wider than hip-width apart. Moreover, the Romanian deadlifts are done one leg at a time with a strap around both knees and a raised knee on each side of the body.
Steps in Workout (DOs’)
-
Start by standing with your feet hip-width apart and the barbell in front of you.
-
Bend at your hips and knees to grab the barbell, keeping your back straight and your core engaged.
-
Lift the barbell to your hips, keeping your arms straight.
-
From here, drive your heels into the ground and stand up straight, extending your hips and knees until your arms are fully extended.
-
Reverse the motion to lower the barbell back to the ground and repeat for the desired number of reps.
Avoid These Common Mistakes (Don’ts)
-
Not using a weightlifting belt: A weightlifting belt helps to support your back and prevent injury.
-
Not maintaining a neutral spine: When deadlifting, be sure to keep your spine in a neutral position to avoid injury.
-
Rounding your lower back: Rounding your lower back puts unnecessary stress on your spine and can lead to injury.
-
Not using the proper form: Be sure to use proper form when deadlifting to avoid injury and get the most out of your workout.
Recommended Sets:
-
For beginners: 3 sets of 5-8 reps
-
For intermediate: 4 sets of 6-10 reps
-
For advanced: 5 sets of 8-12 reps
Top 5 Bicep Exercises For Mass
1-Barbell Curl
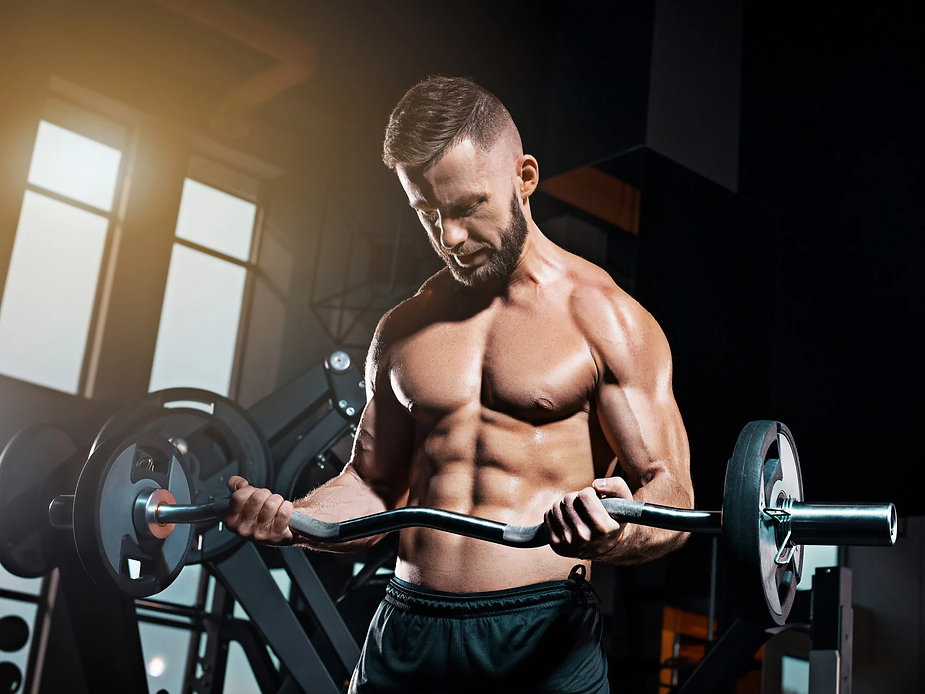
Working out your biceps at the gym is a great way to stay in shape and improve your overall health. The barbell curl is a great exercise for building upper-body muscle and for improving elbow joint health. It’s also a great workout for building bigger biceps, shoulders, and triceps. Plus, it’s a great full-body exercise that will engage your core as you lift and lower the weight.
There are many benefits of the barbell curl, including Improving range of motion, especially in the wrist and elbow joints, strengthening your core muscles as you maintain proper form, Develops upper-body strength and definition. You can do this exercise with dumbbells, barbells, or even your body weight if you’re feeling especially ambitious.
The most important thing is to make sure that you keep your form correct at all times so that you don’t injure yourself in any way. You can also do this biceps exercise at home as this does not require any huge equipment.
Steps in Workout (DOs’)
1. Start by standing with your feet shoulder-width apart and your knees slightly bent.
2. Grip a barbell with an overhand grip, hands shoulder-width apart.
3. Keeping your elbows close to your sides, slowly curl the barbell up to shoulder level.
4. Squeeze your biceps at the top of the Curl, then slowly lower the barbell back to the starting position.
5. Repeat for the desired number of repetitions.
Avoid These Common Mistakes (Don’ts)
-
Not maintaining a strong grip on the barbell – This can lead to the barbell slipping out of your hands and causing injury.
-
Curling the weight too quickly – This can put unnecessary strain on your muscles and joints.
-
Lifting your elbows too high – This takes the tension off of the biceps muscles and puts strain on the shoulders.
-
Not keeping your back straight – This can lead to lower back pain and strain.
Recommended Sets:
-
Beginners: 2 sets of 10 reps
-
Intermediate: 3 sets of 12 reps
-
Advanced: 4 sets of 15 reps
2-Cable Curl
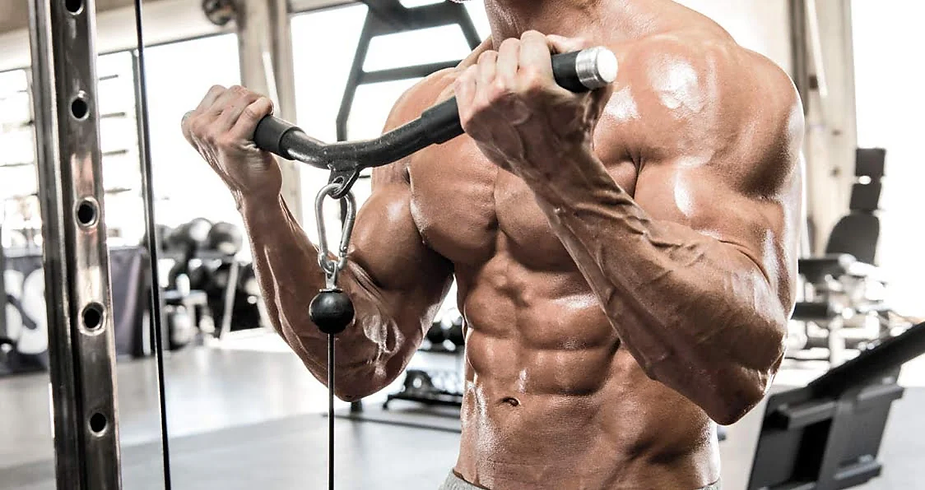
Cable curls are the best exercise for the biceps and your upper and lower body. This workout will build strength in your biceps, forearms, shoulders, and core muscles. They are a great way to shape and tone your arms while building strength in your upper body.
To do cable curls:
-
Stand in front of a cable machine with a high cable and grab the cable with both hands.
-
Curl the weight up while keeping your arms close to your body.
-
Lower the weight back down and repeat the exercise.
Steps in Workout (DOs’)
-
Stand with your feet shoulder-width apart and your knees slightly bent.
-
Holding a cable curl bar with your palms facing up, curl your hands toward your shoulders.
-
Squeeze your biceps at the top of the curl, then slowly lower the bar back to the starting position.
Avoid These Common Mistakes (Don’ts)
-
Not using enough weight: This will result in not enough resistance being placed on the muscles, making it difficult to stimulate growth.
-
Not keeping the elbows stationary: This will cause the triceps to do most of the work rather than the biceps.
-
Not curling the weight all the way up: This will again result in the triceps doing most of the work.
Recommended Sets:
-
Beginners: 3 sets of 8-12 reps
-
Intermediate: 4 sets of 10-12 reps
-
Advanced: 5 sets of 10-12 reps
3-Seated Preacher Curl
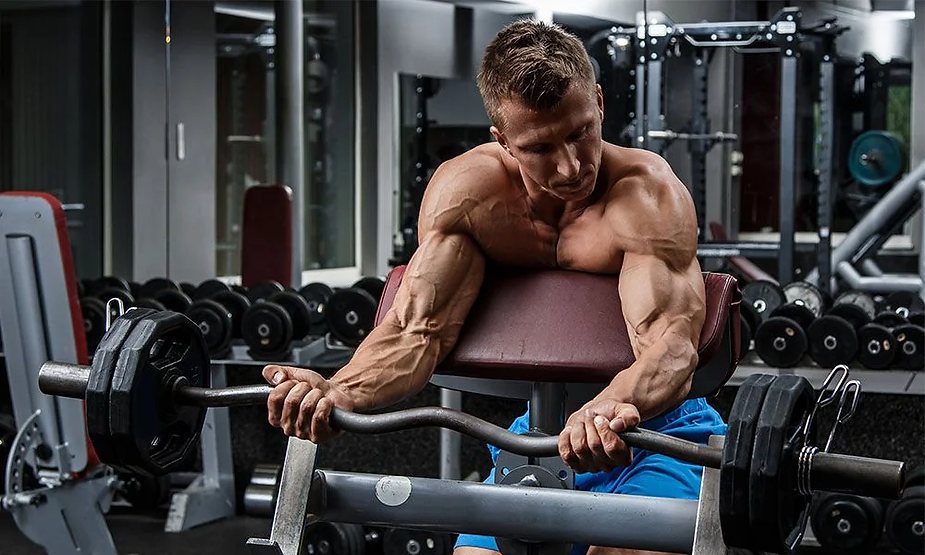
If you’re looking to add some serious size to your arms, you need to start incorporating some long head bicep workouts into your routine. These exercises are designed to target the long head of the biceps, which is responsible for much of the muscle’s mass. It’s especially good for people who have desk jobs or heavy lifting in their daily routine.
It’s also a great way to tone your core as you’re holding yourself up in a sitting position. The seated preacher curl is a type of preacher curl exercise that uses a chair or bench and weights. It is an effective arm and back workout that hits the muscles to make them hard. To get the most out of this biceps and triceps workout for mass,
it’s important to stay hydrated. Drinking water before and during your workout will keep you from becoming fatigued and improve your muscle strength and endurance.
Steps in Workout (DOs’)
-
Start by sitting on a bench with a weight in each hand, palms facing forward.
-
Rest your elbows on your knees and keep your back straight.
-
From here, slowly curl the weights up to shoulder level and squeeze your biceps at the top of the curl.
-
Then, slowly lower the weights back down to the starting position.
-
Repeat for the desired number of repetitions.
Avoid These Common Mistakes (Don’ts)
-
Using too much weight: this can cause strain on the lower back and shoulders and limit the range of motion of the exercise.
-
Not keeping the back straight: this can cause strain on the lower back.
-
Not keeping the elbows in: this can limit the range of motion of the exercise and cause strain on the shoulders.
Recommended Sets:
-
For beginners: 2 sets of 8-12 repetitions
-
For intermediate: 3 sets of 8-12 repetitions
-
For advanced: 4 sets of 8-12 repetitions
4-TRX Suspension Curl
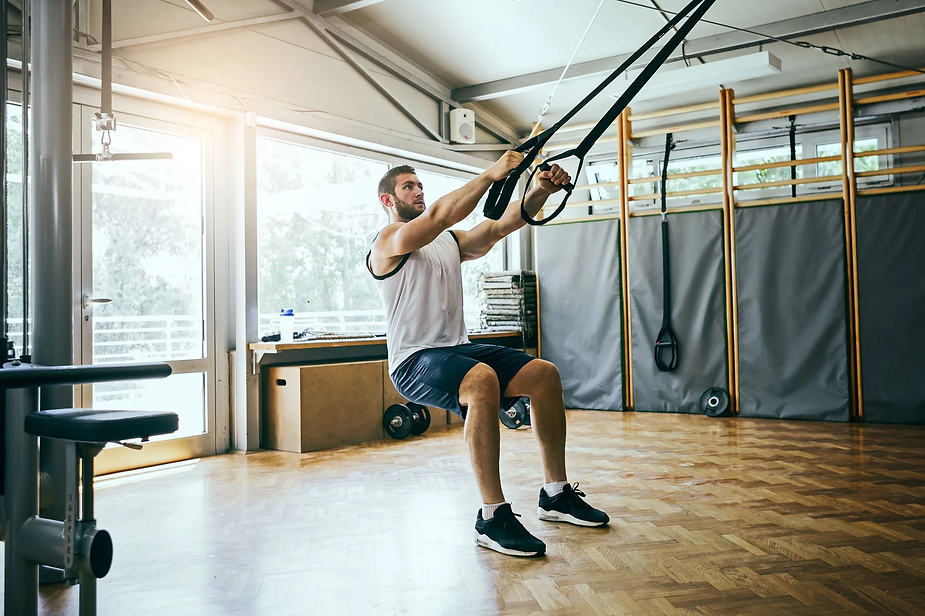
TRX Suspension Curl is a great way to work your arms and shoulders while also engaging your core. The TRX Suspension Curl can be performed with either one arm or two arms, depending on your fitness level. To perform the TRX Suspension Curl, you will need a TRX Suspension Trainer and a small amount of space.
Steps in Workout (DOs’)
-
Start in a standing position with your feet shoulder-width apart and your TRX straps adjusted to mid-calf length.
-
Grab the TRX handles with your palms facing up and your arms extended straight in front of you.
-
Curl your arms up towards your shoulders, maintaining the tension on the TRX straps throughout the movement.
-
Reverse the movement and return to the starting position.
Avoid These Common Mistakes (Don’ts)
-
Not keeping the body in alignment and letting the hips sag
-
Not keeping the abs engaged can lead to lower back pain.
-
Not using a full range of motion and not fully extending the arms at the top of the curl.
-
Not keeping the elbows close to the body puts unnecessary stress on the shoulders.
Recommended Sets:
-
For beginners: 2 sets of 10-12 reps
-
For intermediate: 3 sets of 8-10 reps
-
For advanced: 4 sets of 6-8 reps
5-Seated Alternating Dumbbell Curl
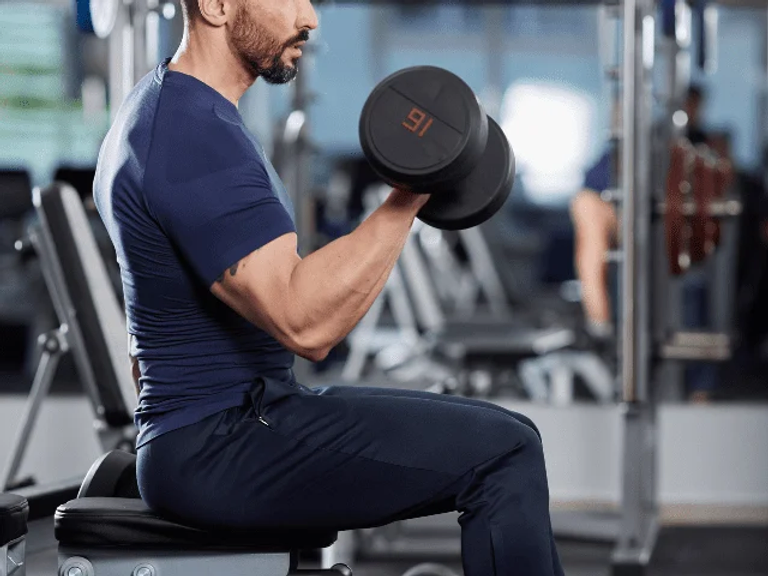
Seated Alternating Dumbbell Curl is the best dumbbell biceps exercise that focuses on the brachial muscle. This exercise is performed using two dumbbells, one in each hand. The motion involves sitting down at the end of the set and curling your arms while alternating between pressing down and lifting repeatedly.
The Seated Alternating Dumbbell Curl is an effective bicep workout for building both strength and size in the biceps. Out of the many benefits of this exercise, it targets the biceps more effectively than other exercises; it allows you to use heavier weights than other exercises, which leads to more muscle growth. Moreover, it is relatively easy to perform and requires no special equipment.
Steps in Workout (DOs’)
-
Sit on a bench with back support and a weight in each hand, palms facing forward.
-
Keeping your back pressed firmly against the bench and your core engaged, curl one weight up to the shoulder while keeping the other arm stationary.
-
Lower the weight back to the starting position and repeat with the other arm.
-
Continue alternating sides.
Avoid These Common Mistakes (Don’ts)
-
Not using a weight that is challenging enough – using a weight that is too light will not provide any benefit and may even be detrimental to your progress.
-
Curling the dumbbells too fast – this can cause you to use momentum rather than muscle power and also puts you at risk of injury.
-
Not alternating arms – this will ensure that both sides of your body get an equal workout.
-
Not keeping your back straight – this can cause strain on your spine and may lead to injury.
Recommended Sets
-
For beginners: 1 set of 12-15 reps
-
For intermediate: 2 sets of 12-15 reps
-
For advanced: 3 sets of 12-15 reps
Final Words
Unleash your inner beast with this back & bicep inferno! Sculpt a Herculean upper body with compound titans like bent-over rows and pull-ups, then chisel razor-sharp biceps with targeted curls and preaches. This powerhouse routine ignites explosive growth and defines your physique from every angle.
Level up your gains with:
-
Synergy Surge: Bicep & back work together, amplifying muscle activation and efficiency.
-
Fortress Foundation: Compound lifts sculpt a powerful base, engaging multiple muscle groups.
-
Sculpted Precision: Bicep isolations like curls and preaches add chiseled definition to your upper body.
-
Scalable Intensity: From newbie to seasoned warrior, adjust weight and reps to conquer your fitness goals.
Share this content:


Post Comment